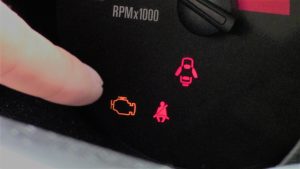
The check engine light is an indication that allows the onboard diagnostic system to detect any kind of malfunction that happens in the vehicle’s fuel, emission, exhaust, or ignition system. All kinds of vehicles like trucks, cars, bikes, etc., have these check engine lights or onboard diagnostic systems.
If the check engine light blinks or flashes, it will indicate misfiring issues. So, you have to repair it immediately. But, if you avoid this severe problem, your vehicle will be at serious risk of damage. So, take the vehicle right away to a nearby garage for repair as soon as you see the check engine light blinking.
Can I Reset My Own Check Engine Light?

Yes, you can easily reset your check engine light if you intend to save repairing money. The on-off process is the most basic fixing to solve your check engine light reset matter.
This on-off system powers the computer to reboot and refresh all the saved data. But, how will you do this simple on-off job? Well, put your key into the ignition and turn it on and then off again for seconds. Remember to hold for a few seconds each time you turn the ignition on and off. Continue doing this process 4 or 5 times. Your job will be done.
Still, there are some fundamental steps that you should go through if your on-off process doesn’t work. So, the next part of our article will show you how you can reset the check engine light of your vehicle with ease.
How to Reset the Check Engine Light

Step 1: Examine the Check Engine Light on the Dash:
Turn the ignition on in your very first step to reset the check engine light. Now test whether the check engine light is flashing or it is steady. If you find the light is steady, it will surely create problems with the computer system in your vehicle. If you are confused about what kind of problem can be occurred in the computer system, we can say the sensor’s function as an example.
Sensors will stop collecting and receiving data in the computer system. And, when the check engine light is flashing, it can misfire in the total ignition system. So, you can simply turn the key off if any of these situations happen to you.
Step 2: Locate the Check Engine Light Jumper Plug
You have to remove the kick panel if you want to get trouble-free access to the jumper plug and engine control unit. The kick panel is situated on the passenger’s side foot by the side door. But, you might be confused about recognizing the jumper plug wire.
Well, the jumper plug comes in two different colors (blue & grey) depending on the model of your Honda. The blue plug will carry one black and one brown wire, while the grey plug comes with one green and one brown striped wire. So, now it is easier for you to identify the plug wire.
Step 3: Engage the Jumper Plug
Once you passed steps 1 and 2 successfully, you’ve to engage the vehicle’s jumper plug next. And to do so, stripe the last part of any two-speaker wires and insert each of the last parts into the jumper plug terminal. The jumper plug will be engaged perfectly.
Step 4: Turn on the Ignition Switch
Now, it’s time to start the ignition switch, so turn it on and see how normal the check engine light is flashing. All you can do is count the number how many times the check engine light flashes so that you can get the CEL code trouble-free.
Determine the flashes following the time set below-
You can consider around one second for each long flash, while half of a second will be considered to determine a shortcode.
Step 5: Reset the check engine light
You can now easily reset the check engine light but reset the ECU before going for the CEL. Enable the interior fuse box access to the left side of the driver. Now prevent the panel cover and get access to the fuses of your vehicles.
And here, you can apply the fuse panel diagram to identify each fuse’s exact location. Also, you can use the needle-nose pillar or fuse pillar to eliminate fuses 7.5A easily. It will take 3 or 4 minutes for you to wait. Now, re-attach the fuse and reset your check engine light.
How Long Does Check Engine Light Take to Reset?
It depends on the type of vehicle; for instance, the check engine light automatically resets after 10 or 20 cycles. But, this timing measurement is right for the car only. To reset the check engine light for the car, you’ll have to drive 30 to 100 miles before you start the process. But, for other vehicles, the measurement will be 50 to 100 miles.

As a mechanical engineer, it’s easy for David to explain the functionality of the tool. David test most of the tools before writing a review. its help him to learn something new and suggest the best product for you.


[…] What a Check Engine Light Means? […]